Outline:
1) Setup
2) Procedure
a. Requisition
b. Directly Add Non-Inventory PO
Setup:
1) System Configuration Switches
a. Set GL Ref required if desired
GL Reference Required: If you set this switch to Y, Exact MAX will require a valid GL Reference when receiving non-inventory purchase orders (see Inventory > Transactions> Non-Inventory tab). If an invalid GL Reference is entered, Exact MAX displays the message: ERROR, INVALID GL REFERENCE. Users cannot complete the receipt until a valid GL Reference is entered.

2) GL Account Setup for Non-Inventory Items Optional

Procedure:
1) Log into Purchasing
2) Select Activity > Purchase Schedule
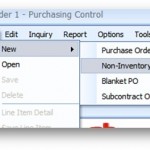
3) In Purchase Schedule select Non-Inventory
4) Select PR Schedule > Add Req Line

5) Fill out all the detail on the Non-Inv Req for the requisition

6) Select Activity > Purchase Schedule >
7) Check Non-Inventory > Order Status Release
8) Fill Approved by field

9) Highlight the Requisition line that you want to place on the PO
10) You can use the Assign button to assign the req line to an existing PO.
11) You can use the Auto Assign to assign it to the last PO
12) If you Open a new Non-Inventory PO and place it in the background of you can select the line > hold down the left shift button > hold down the right mouse button and then drag the line over the line item area of the PO to “drop” the lines onto a new PO.

Add Non-Inventory PO directly
Select Activity > Purchase Order > Non-Inventory PO
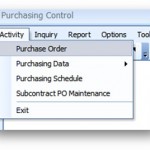
Select Vendor

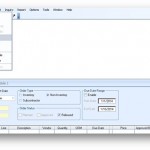
Enter PO Line details and description

When the goods have arrived make sure to use the Non-Inventory Receipt transaction tab in Inventory Control
Inventory Control > Activity > Transactions > Non-Inventory
